Can You Plant Arborvitae in Clay Soil?
Yes — but technique matters more than in well-drained soil. Arborvitae are more clay-tolerant than most evergreens, and Green Giant in particular handles wet, heavy soils better than almost any other privacy tree. The key is avoiding the mistakes that turn "clay-tolerant" into "clay-killed."
This guide covers which varieties handle clay best, how to plant correctly in clay, what to avoid, and how to improve drainage when your site is borderline.
Clay Soil Tolerance by Variety
| Variety | Clay Tolerance | Wet Soil Tolerance | Notes |
|---|---|---|---|
| Green Giant | Excellent | Good | Best choice for heavy clay; handles periodic wet conditions |
| Emerald Green | Good | Moderate | Handles clay well if drainage is reasonable; avoid standing water |
| Elegantissima | Moderate | Low–Moderate | Prefers well-drained soil; drought-tolerant but not wet-tolerant |
| Golden Globe | Moderate | Low | Needs good drainage; not ideal for heavy clay without amendment |
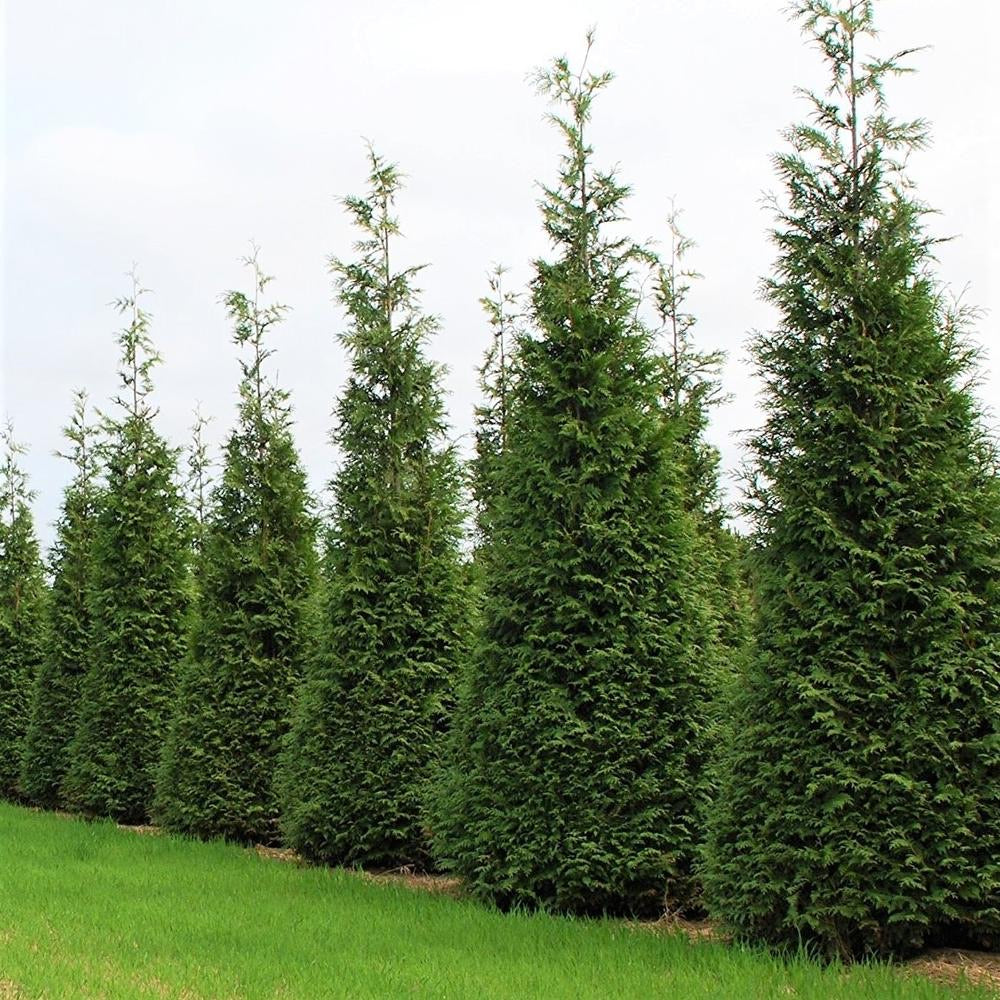
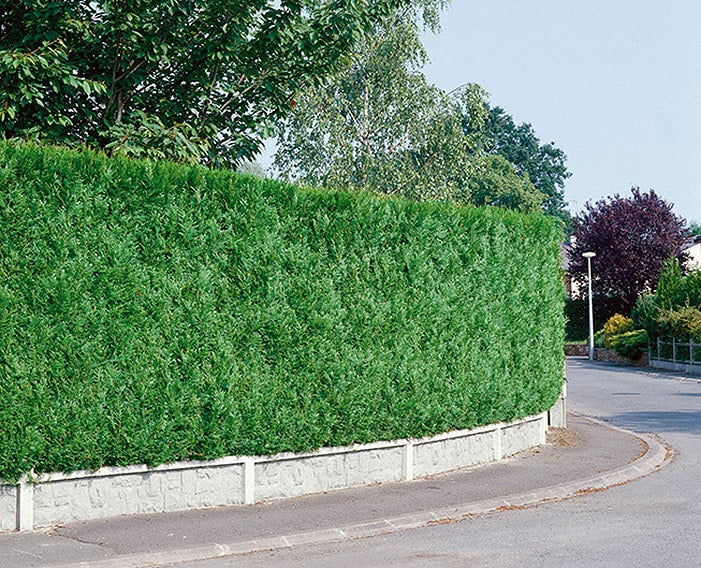
Green Giant in Clay Soil: The Best Option

Green Giant is the arborvitae to reach for when you have heavy clay. Its hybrid parentage — Western Red Cedar crossed with Japanese Arborvitae — gives it a robust root system that handles compacted, wet soils far better than most evergreens. It’s one of the few fast-growing privacy trees that genuinely thrives in clay with proper planting technique.
What Green Giant tolerates in clay:
- Heavy, compacted clay soils
- Periodic wet conditions after rain
- Slow-draining sites that would stress or kill other evergreens
What it still won’t tolerate:
- Permanently saturated soil or standing water
- Sites where water pools for more than 48–72 hours after rain
Shop Green Giant Arborvitae → Green Giant Full Growing Guide →
Emerald Green in Clay Soil

Emerald Green handles clay reasonably well as long as drainage is adequate. It’s not as clay-tough as Green Giant, but it performs well in moderately heavy soils where water doesn’t pool. The key with Emerald Green in clay is planting slightly high (root ball 1–2 inches above grade) and mulching heavily to moderate soil moisture swings.
Shop Emerald Green Arborvitae → Emerald Green Full Growing Guide →
How to Test Your Drainage Before Planting
Before you plant anything, do a simple drainage test:
- Dig a hole 12 inches deep and 12 inches wide in your planting area
- Fill it with water and let it drain completely
- Fill it again and measure how fast the water drops
Results:
- Drains 1–3 inches per hour: Good drainage — plant normally
- Drains 0.5–1 inch per hour: Slow drainage — plant high, amend backfill, mulch well
- Drains less than 0.5 inches per hour: Poor drainage — build a raised berm or choose a different site
- Still has standing water after 24 hours: Do not plant arborvitae here without significant drainage improvement
How to Plant Arborvitae in Clay Soil: Step by Step
The technique for clay is different from planting in well-drained soil. Follow these steps to give your trees the best chance:
Step 1: Dig Wide, Not Deep
Dig the hole 2–3x the width of the root ball but only as deep as the root ball. In clay, a deep hole becomes a bathtub — water collects at the bottom and drowns the roots. Wide is what matters: it loosens the surrounding clay so roots can spread outward.
Step 2: Plant High
Set the root ball so the top sits 1–2 inches above the surrounding grade. This is the single most important clay-soil adjustment. It ensures the root flare stays above the waterline even after rain and soil settling.
⚠️ Never plant flush with grade in clay. What looks level at planting will be below grade after the first heavy rain compacts the soil around the root ball.
Step 3: Amend the Backfill — But Not Too Much
Mix the excavated clay with compost at a ratio of 75% native clay : 25% compost. This improves drainage and aeration without creating a "container effect" where roots circle inside the amended zone instead of spreading into the surrounding soil.
Do not:
- Use pure compost or potting mix as backfill — it creates a drainage barrier at the interface with native clay
- Add gravel to the bottom of the hole — this creates a perched water table and makes drainage worse, not better
- Over-amend — too much organic matter in clay can become waterlogged itself
Step 4: Build a Soil Berm
After backfilling, mound the remaining soil into a gentle berm around the outer edge of the planting hole. This creates a watering basin that directs water to the roots while keeping the trunk and root flare elevated above the surrounding grade.
Step 5: Mulch Generously
Apply 3–4 inches of wood chip mulch over the entire planting area, extending well beyond the root ball. In clay soils, mulch does double duty: it moderates the extreme wet-dry cycles that clay is prone to, and it encourages beneficial soil biology that gradually improves clay structure over time.
Keep mulch 3 inches away from the trunk — mulch against the trunk in clay soils is especially problematic because moisture stays trapped longer.
Step 6: Water Carefully in Year 1
Clay soils hold moisture much longer than sandy or loamy soils. Overwatering is a real risk — especially in the first season before the tree’s roots have spread into the surrounding soil.
- Check the root ball moisture specifically before watering — not just the surrounding soil
- Water when the top 2–3 inches of the root ball feel dry, not on a fixed schedule
- In wet springs or rainy periods, you may not need to water at all
When to Build a Raised Berm
If your drainage test shows water sitting for more than 24 hours, a raised berm is your best option. A berm raises the entire planting area 12–18 inches above the surrounding grade, putting the root zone above the water table.
How to build a simple planting berm:
- Mark out the berm area — at least 6–8 feet wide per tree for a hedge
- Bring in a mix of topsoil and compost (60/40) to build the berm to 12–18 inches above grade
- Taper the edges gradually so the berm blends into the landscape
- Plant into the berm using the same high-planting technique described above
- Mulch the entire berm surface
A well-built berm also looks intentional and attractive — it’s not just a drainage fix, it’s a landscape feature.
Signs Your Arborvitae Is Struggling with Clay or Drainage
- Yellowing foliage that starts at the interior and works outward — often root rot from waterlogged soil
- Slow or no growth despite adequate sun and water — compacted clay limiting root spread
- Browning from the bottom up — can indicate root stress from poor drainage
- Leaning or instability — roots unable to anchor in saturated clay
Why Is My Arborvitae Turning Brown? Full Diagnosis →
Frequently Asked Questions
Can arborvitae grow in clay soil?
Yes — especially Green Giant, which is one of the most clay-tolerant privacy trees available. The key is planting high (root ball 1–2 inches above grade), amending the backfill with compost, and mulching heavily. Avoid sites with standing water after rain.
Which arborvitae is best for clay soil?
Green Giant is the clear winner for clay. Its robust root system handles heavy, compacted, and periodically wet soils better than any other arborvitae variety. Emerald Green is a solid second choice for moderately heavy clay with reasonable drainage.
Why is my arborvitae dying in clay soil?
The most common cause is root rot from poor drainage — the hole filled with water and the roots suffocated. Other causes include planting too deep (root flare buried) or over-amending the backfill creating a drainage barrier. Check drainage first, then planting depth.
Should I add gravel to the bottom of the hole when planting in clay?
No — this is a common myth that actually makes drainage worse. Gravel at the bottom of a clay hole creates a perched water table: water fills the gravel layer before it can drain into the surrounding clay, keeping the root zone wetter than if you’d used no gravel at all.
How do I improve clay soil for arborvitae long-term?
Mulching is the most effective long-term clay improver. Wood chip mulch feeds soil biology that gradually breaks down clay structure and improves drainage over 3–5 years. Annual compost top-dressing around the drip line also helps. Avoid tilling — it destroys soil structure and makes clay worse.
Shop Arborvitae at Weaver Family Farms
All four varieties grown right here and shipped ready to plant.
Green Giant → Emerald Green → Elegantissima → Golden Globe →
More Arborvitae Resources
How to Plant Arborvitae: Full Guide → Best Arborvitae for Privacy Screens → How Fast Does Arborvitae Grow? → Which Arborvitae Should I Plant? → Arborvitae Winter Care Guide →
About the Author
Dax Weaver is the owner of Weaver Family Farms Nursery, a family-run nursery specializing in fruit trees, berry plants, and privacy evergreens shipped direct to homeowners across the US. Dax has spent years growing and studying the plants he sells, with a focus on helping customers choose the right variety for their specific site, zone, and goals. When he’s not in the nursery, he’s writing practical growing guides based on real-world experience — not just what the textbooks say.